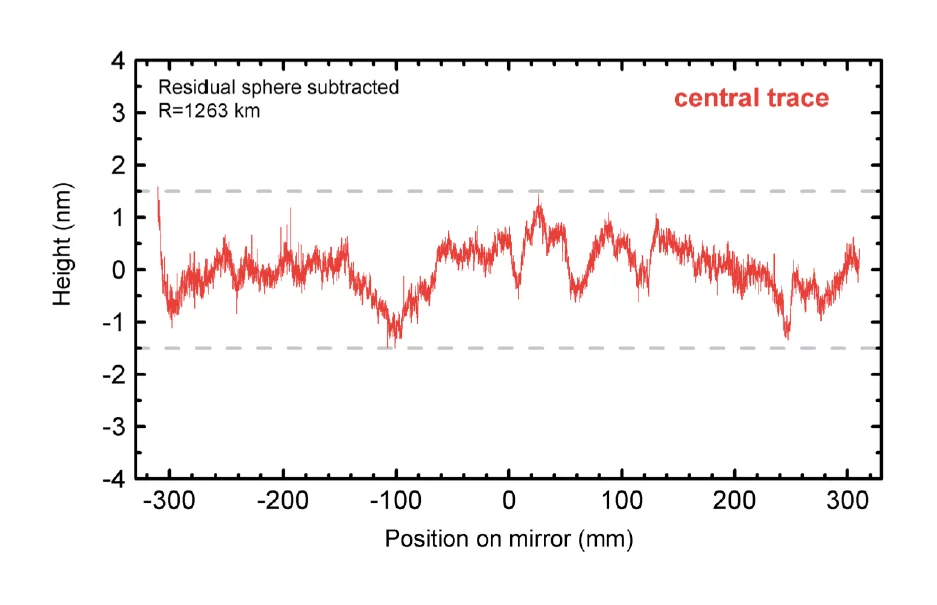
Mirrors are key elements to distribute and shape the Xray beam generated by the undulators of the SwissFEL facility. They are essential tools to guide and focus the light according to the specific users requirements and should do this without noticeable effects on the beam quality. A quantitative measure is the quality of the beam wavefront. The wavefront must be conserved by the optical elements in the SwissFEL beamlines within a fraction of the wavelength which can be as short as one Angstrom in the case of the Aramis beamline. There are only a few companies in the world, who are able to fabricate such ultraprecise mirrors. Shortly before Christmas, we received the first mirror for the Aramis beamline. The company JTEC, located in Osaka, was able to fabricate the M-201 mirror within our tight specifications. Over the central length of 620 mm, the mirror profile deviates by only 3 nm peak to valley (0.5 nm rms) from perfect sphere with a mean radius of 1263 km. To get an impression of this accuracy, suppose we scale the sphere to the radius of the earth and place a human hair with approx. 45 μm diameter across the equator. The resultant bump would then be 3000 times higher than the maximum profile error.
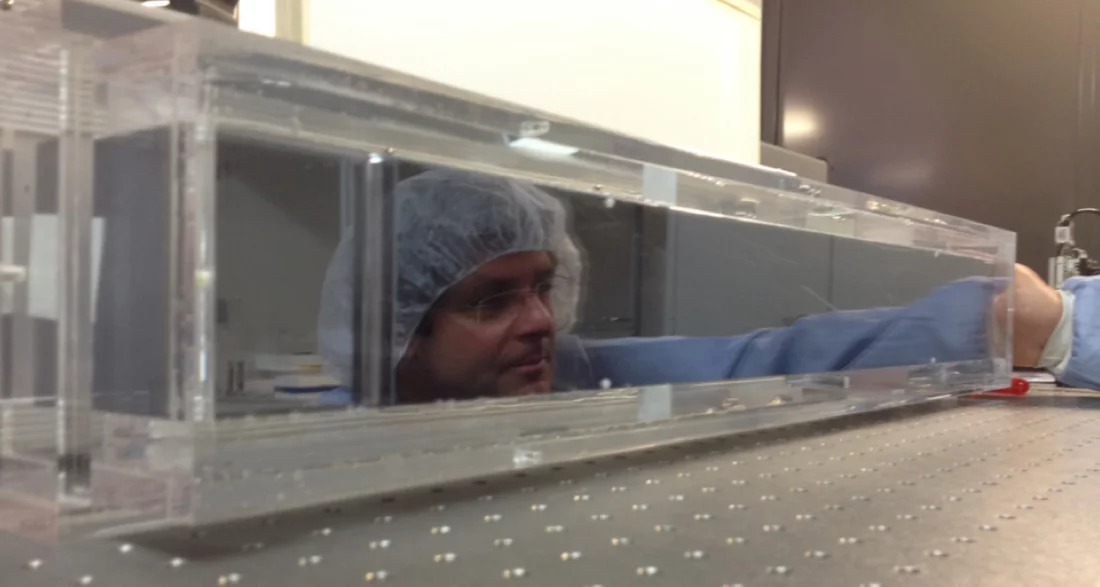
Figure 1 shows a profile scan along the center of the mirror as provided by the supplier. The height is well within the specified maximum profile error of 3 nm (PV). Currently the mirror is in the metrology laboratory for detailed inspection and acceptane measurements of the surface profile (Figure 2).
Figure 1 shows a profile scan along the center of the mirror as provided by the supplier. The height is well within the specified maximum profile error of 3 nm (PV). Currently the mirror is in the metrology laboratory for detailed inspection and acceptane measurements of the surface profile (Figure 2).
Facility: SwissFEL
Reference: Rolf Follath; rolf.follath@psi.ch; Paul Scherrer Institut, CH-5232 Villigen PSI, Switzerland
Reference: Rolf Follath; rolf.follath@psi.ch; Paul Scherrer Institut, CH-5232 Villigen PSI, Switzerland

